Time to Print
Jesse Morgan
After finally getting my 3d printer, I thought I should start keeping track of what I’m doing.
Printer: Monoprice Maker Select Plus
Standard Filament: MP Select PLA Plus+ Premium 3D Filament (white)
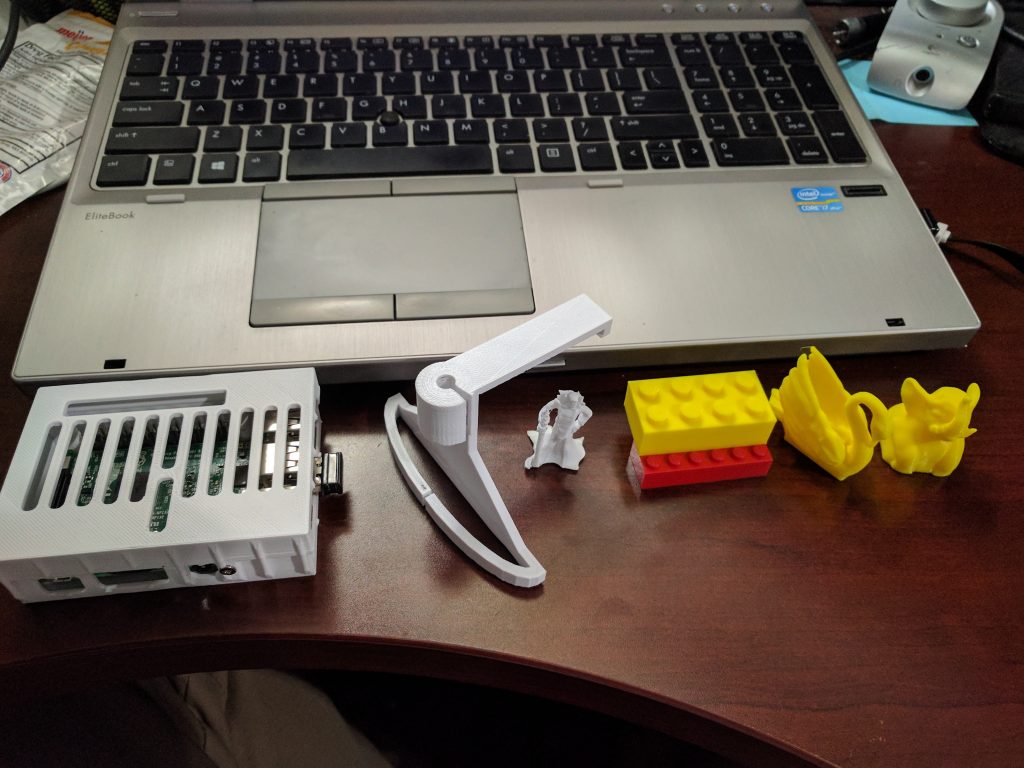
After Unboxing it and getting everything aligned, I printed 1.gcode and 2.gcode from the SD card that came with it using the yellow PLA filament that came with it. The first was a small elephant, the second was a swan.
Quick Backstory
I had played a bit with FreeCAD while waiting for the print and had followed a tutorial for creating a “lego.”
As you may or may not know, There are 2 steps in designing a 3d part
- designing the regular 3d object in 3d modeling software like 3DSM, Maya, Blender, FreeCAD, etc to create an STL file.
- converting the STL with a slicer program like Cura into a gcode file.
The Gcode is basically a set of assembly-like instructions for controlling the printer- move 2mm, extrude, move 3mm, retract, travel 10mm, etc. What’s important to note is that Cura needs to be configured for your specific printer model.
- The good news is that Monoprice ships with a free copy of Cura
- The bad news is that they only include the exe version
- The good news is you can run it with wine
- The bad news is that it’s not only in chinese(?), but fails to install with an error (that is also not in english).
This makes it really hard to configure Cura properly. My first attempts did not go great, but after doing a bit of research, I found that the “Prusa i3 Mk2” model was “close enough” with some minor modifications:
The Lego
After some tinkering and trial and error, I was able to print my self-designed lego sliced with my own copy and configured version of Cura, however somewhere along the way it became supersized. It fits roughly 3 regular lego pegs to every 2 on my block. I’m not sure where things fell apart, but I need to re-examine the FreeCad file and get the calipers out to figure out if the instructions were wrong or if I did something incorrect.
Anyways, the Lego used up almost the last of my sample yellow, so I opened my new standard filament, the white PLA from monoprice.
The Drow Wizard
The first thing I printed was a Drow Wizard from Shapeways. it was fairly complex, and so-far the printer is completely untuned, so it’d give me a good idea of what I’m working with.
It was pretty rough. There were a lot of strings between the staff and the figure, and the face had no detail. After a bit of cleanup, it’d be passable for kids, but it was still lower quality than I was hoping for
The Filament Guide
The next thing I printed was the filament guide upgrade for the printer itself. This was my first time using a support, and man did it waste a lot of filament. After some cleanup, it came out decent, but still had some print flaws- namely a hole in the top of the guide arm where the top layer wasn’t think enough and inside the “C” at the top, the edges pulled away from the rest of the print. It’s probably still usable, but I’ll eventually print a better one.
The first “real use” part was a Raspberry Pi 3 case I found on Thingiverse. The Top came out rather nice (but still has some flaws), and I’m waiting for the bottom to finish as I type this.
While waiting, I’ve done a bit of research on some of the flaws I’ve noticed and am coming up with a list of things to try. Before I make any further adjustments, I’m going to print a 3dSketchy boat that is commonly used for calibration tests. Once I do that, I’ll probably print 3 or 4 more, trying different configurations and tweaks.
